
In an earlier post in this Mastering Azure FinOps series, we saw how resources can be tagged manually and by (Azure) Policy. However, there are other ways to apply resource tags, too. This blog focuses on Azure Resource Tagging with PowerShell, another common way to apply tags to Azure Resources. We will explore how to report missing tags, enforce a tagging policy, and update and delete tags and tag values.
Overview
In this blog, we walk you through all the steps, from meeting the requirements to run PowerShell scripts to the actual running of PowerShell scripts for different purposes. Of course, we provide several sample scripts you can use for your own purposes.
The article has the following topics:
- Meeting PowerShell requirements.
- Reporting Missing Tags.
- Enforcing a Tagging Policy.
- Replacing and removing Resource Tags and/or Values.
- Automatically Tagging New Resources.
Meeting PowerShell requirements
You probably already know that you can run PowerShell scripts in the following ways:
- From your local Windows desktop computer.
- As a Cloud Shell in the Azure portal.
Before running PowerShell scripts successfully, you must meet some requirements. This section discusses these requirements and provides the steps to meet them.
Running PowerShell scripts from your local computer
In case you have never connected before to Azure from your computer with Windows PowerShell, you might need to install the Az module.
Follow the below steps to install the Az module:
- Start Windows PowerShell (as an Administrator).
- If you don’t already have it, install the Azure PowerShell module.
Install-Module -Name Az -AllowClober -Force - Next, you connect to Azure using the following command.
Connect-AzAccount
When required, a login dialog appears, allowing you to log in.
When you have access to multiple Azure subscriptions, you can select a subscription from the list that appears.
Troubleshooting
When you run into issues, especially when running the Install-Module command, you can use the following commands to fix the issue.
| What is the issue | Command to use | Purpose | Example | More information |
|---|---|---|---|---|
| You want to check the current script execution policies | Get-ExecutionPolicy | Get a list of the current script execution policies | Get-ExecutionPolicy -List | Documentation |
The Install-Module command doesn’t have the required permissions to run | Set-ExecutionPolicy | Allow PowerShell commands to be executed | Set-ExecutionPolicy -ExecutionPolicy RemoteSigned -Scope CurrentUser -Force | Documentation |
| You want to understand if the Az module is installed | Get-InstalledModule | List the most recent installed Az module | Get-InstalledModule -Name Az | Documentation |
You must update the Az module to the most recent version | Update-Module | Update the Az module to the most recent version | Update-Module -Name Az | Documentation |
You want to uninstall the Az module | Uninstall-Module | Uninstall the most recent version of a module | Uninstall-Module -Name Az | Documentation |
Running PowerShell scripts from Azure Cloud Shell
When running PowerShell scripts from the Azure portal, you need to start an Azure Cloud Shell and set the context to the subscription you want to use for running the PowerShell scripts.
Follow the below steps to achieve this:
- Log in to the Azure portal (https://portal.azure.com).
- In the portal, click the Azure Cloud Shell icon.

In the lower part of the portal, the Cloud shell appears. - You might have to switch between Bash scripts and PowerShell scripts. If the button in the upper left corner mentions ‘Switch to PowerShell’, you need to click it and wait for the PowerShell scripting environment to appear.

- Now, set the required context by using the following command.
Set-AzContext -Subscription "Name of the subscription" - Any PowerShell scripts you want to run can be uploaded using the
Manage files > Uploadoption. - Use the
dirorlscommand to understand the files in the current folder.
- To run a Powershell script, type
./<Name of the script>and hit Enter.
./ReportMissingTags.ps1


Provided you have connected to the same Azure subscription from Windows PowerShell and Azure Cloud Shell, running PowerShell scripts should give the same results.
Reporting Missing Tags
You can use PowerShell scripts to understand the current resource tags in the earlier selected subscription.
For example, you can run a script to check the existence of specific tags. The below script checks all resources from a subscription for the existence of the tags Environment, Cost Center, Service, and Owner.
# Step 1: Define the required tags
$requiredTags = @("Environment", "CostCenter", "Owner")

# Step 2: Get all resources in a subscription
$resources = Get-AzResource

# Step 3: Initialize an empty array for resources that are missing tags
$missingTagResources = @()

# Step 4: Loop through resources and check for missing tags
foreach ($resource in $resources) {
    # Step 4.1: Get the tags for the current resource
    $currentTags = $resource.Tags

    # Step 4.2: Initialize a list of missing tags for this resource
    $missingTags = @()

    Write-Host "Resource: " -NoNewline
    Write-Host $resource.Name

    # Step 4.3: If resource has no tags, report missing tags
    if ($currentTags.Count -eq 0)
    {

       # Step 4.3.1: Add all required tags to the array of missing tags
       foreach ($tag in $requiredTags) {
           $missingTags += $tag
       }

       # Step 4.3.2: Combine Resource name and missing tags for reporting
       $missingTagResources += [pscustomobject]@{
           ResourceName = $resource.Name
           MissingTags  = $missingTags -join ", "
       }

       # Step 4.3.3: Leave this cycle of the loop and continue with the following resource
       continue
    }

    # Step 4.4: Add missing tags for this resource to the array of missing tags
    foreach ($tag in $requiredTags) {
        if (-not $currentTags.ContainsKey($tag)) {
            $missingTags += $tag
        }
    }

    # Step 4.5: Combine Resource name and missing tags for reporting
    if ($missingTags.Count -gt 0) {
        $missingTagResources += [pscustomobject]@{
            ResourceName = $resource.Name
            MissingTags  = $missingTags -join ", "
        }
    }
}

# Step 5: Output the report to CSV file
$reportPath = "MissingTagsReport.csv"
$missingTagResources | Export-Csv -Path $reportPath -NoTypeInformation

# Step 6: Output the report to screen
$missingTagResources | Format-Table -AutoSize
Breakdown of the script
- In Step 1, you can provide the tags you want to verify their existence.
- In Step 2, the script fetches all resources within the subscription. If you want to fetch a limited set of resources within the subscription, you can provide different parameters of the
Get-AzResourcecommand.
Examples:
Get a specific ResourceGet-AzResource -Name myResource
Get resources whose name matches the provided wildcard
Get-AzResource -Name myResource*
Get all resources of a Resource GroupGet-AzResource -ResourceGroupName myResourceGroup
Get all resources of a specific Resource TypeGet-AzResource -ResourceType Microsoft.Compute/virtualMachines
You can find more examples at Microsoft Learn. - In Step 4, the script loops through all resources. If the script finds missing tags for any resource, it adds them to an array for reporting purposes.
- Steps 5 and 6 report the missing tags to the screen and a CSV file. Reporting to a comma-separated file can be helpful for further analysis in Excel.
You can run the above script manually, of course, but you might want to schedule this script daily, weekly, or monthly and receive a report when specific resources do not meet the Tagging policy. We’ll focus on this in a future blog post.
Enforce a Tagging Policy with PowerShell
Next, we can enforce resource tags by running another script. The below script applies the required tags to all the resources of a resource group.
# Step 1: Define the Resource Group for which the tags must be applied, and define the required tags in an array
$resourceGroup = "t360-rg"
$tags = @{ Environment = "Production"; CostCenter = "12345"; Owner = "Sales" }

# Step 2: Get all resources in the resource group
$resources = Get-AzResource -ResourceGroupName $resourceGroup

# Step 3: Apply tags to each resource
foreach ($resource in $resources) {
    Set-AzResource -ResourceId $resource.ResourceId -Tag $tags -Force
}
Breakdown of the script
- In Step 1, you can use the variable
$resourceGroup to provide the resource group you want the tags to be applied to. The$tagsvariable defines the tags, including the expected values, that must be applied. - In Step 2, the
Get-AzResourcecommand is used to fetch the resources of the provided resource group. If you prefer to fetch all resources within the current subscription, omit the-ResourceGroupNameparameter. The previous section of this article contains more examples of theGet-AzResourcecommand. - In Step 3, the script loops through all fetched resources and applies the required tags.
Replacing and removing Resource Tags and/or Values
When resources have Tags or Tags have values that do not meet the Tagging policy or are no longer required, you can also use PowerShell scripts to clean up those unneeded Tags and/or Tag values. Removing unneeded Tags and values is an example of proper Tag Management, which helps keep the overview of all the tags you applied to your resources and prevent confusion about specific Tags and Tag values that have been used.
Let’s have a look at the following:
- Replacing the values of existing tags.
- Delete resource tags.
- Delete tags at resource or subscription level.
Replacing the values of existing tags
In a situation where you have a resource with a specific tag but need to change the value of the tag, you can use the script below. In this case, the resources have a tag CostCenter with a value of 12345, but we want to change this value to 56789. Also a tag Environment will be applied.
Important: This script uses the Replace operation of the Update-AzTag command. This operation is destructive and replaces all existing tags with the newly provided tags.
# Step 1: Define the Resource Group for which the tag CostCenter must get a new value and provide the tag/value pair(s) that must be applied to the resource(s).
$resourceGroup = "t360-rg"
$tags = @{ Environment = "Production", CostCenter = "56789" }

# Step 2: Get all resources in the resource group
$resources = Get-AzResource -ResourceGroupName $resourceGroup

# Step 3: Apply tags to each resource
foreach ($resource in $resources) {
    Update-AzTag -ResourceId $resource.ResourceId -Tag $tags -Operation Replace
}
Breakdown of the script
- In Step 1, you can use the variable
$resourceGroup to provide the resource group you want tags values to be updated. The$tagsvariable defines the tags, including the expected values, that must be applied. - In Step 2, the
Get-AzResourcecommand is used to fetch the resources of the provided resource group. If you prefer to fetch all resources within the current subscription, simply omit the-ResourceGroupNameparameter. The previous section of this article contains more examples of theGet-AzResourcecommand. - In Step 3, the script loops through all fetched resources and replaces the values of the CostCenter tag within the resource group.
We have used the Replace operation of the Update-AzTag command to update tag values. However, the Update-AzTag command has a few other Operations that can be used. Here you have an overview of all the Operations, including their purpose:
- Merge operation – Merges existing resource tags with new tags. This overwrites tag values from existing tags.
- Replace operation – Removes all existing tags and replaces them with the newly provided tags.
- Delete operation – Removes provided tags from a resource.
For a more complete explanation of the Update-AzTag command, please refer to the Documentation page.
Delete resource tags
You might also want to remove tags from (a set of ) resources. This is, for example, helpful when deleting tags you no longer need. In such a case, you can use the Update-AzTag command with the Delete operation.
# Step 1: Define the Resource Group for which you want to remove a tag or the tags, and the key/value pair of the tag you want to remove.
$resourceGroup = "t360-rg"
$tagToRemove = @{"CostCenter" = "12345"}

# Step 2: Get all resources in the resource group
$resources = Get-AzResource -ResourceGroupName $resourceGroup

# Step 3: Apply tags to each resource
foreach ($resource in $resources) {

   # Step 3.1: Delete just a specific tag with a particular value
   Update-AzTag -ResourceId $resource.ResourceId -Tag $tagToRemove -Operation Delete

   # Step 3.2: Delete all tags from the resource
   # $tags = $resource.Tags
   # Update-AzTag -ResourceId $resource.ResourceId -Tag $tags -Operation Delete

}
Breakdown of the script
- In Step 1, you can use the variable
$resourceGroup to provide the resource group for which you want a tag, or all tags, to be removed.The$tagToRemovevariable defines the tag, including its value, that must be removed.
Note: The$tagToRemovevariable in the above script has a tag calledCostCenterwith a value of12345. This implies that onlyCostCentertags with the value12345will be deleted when the script is executed. If the script encounters resources withCostCentertags with different values, the script will not delete theCostCentertag. - In Step 2, the
Get-AzResourcecommand is used to fetch the resources of the provided resource group. If you prefer to fetch all resources within the current subscription, simply omit the-ResourceGroupNameparameter. An earlier section of this article contains more examples of theGet-AzResourcecommand. - In Step 3, the script loops through all fetched resources
- In Step 3.1, the script deletes the
CostCentertags that have the value12345for the resources within the resource group. - As an additional example, in Step 3.2, if you remove the comment marks (#) and add a comment mark before the
Update-AzTagcommand in Step 3.1, the script will delete all the tags it encounters for the resources in the loop.
Delete tags at resource or subscription level
For tag cleaning at resource group or subscription level, you can delete unneeded tags from the resource group or subscription with the script below.
# Step 1: Define the Resource Group for which the tags must be removed
$resourceGroup = "t360-rg"

# Step 2: Get all resources in the resource group
$resources = Get-AzResource -ResourceGroupName $resourceGroup

# Step 3: Apply tags to each resource
foreach ($resource in $resources) {
    Write-Host "Resource: " -NoNewline
    Write-Host $resource.Name

    Remove-AzTag -ResourceId $resource.ResourceId
}
Breakdown of the script
- In Step 1, you can use the variable
$resourceGroup to provide the resource group for which you want the tags to be deleted. - In Step 2, the
Get-AzResourcecommand is used to fetch the resources of the provided resource group. If you prefer to fetch all resources within the current subscription, simply omit the-ResourceGroupNameparameter. An earlier section of this article contains more examples of theGet-AzResourcecommand. - In Step 3, the script loops through all fetched resources in the resource group and deletes all the tags for the resources it encounters.
With the Remove-AzTag and the Update-AzTag commands, you now have two commands to delete tags at resource level. Each command serves a specific purpose; with Remove-AzTag you can remove tags from a resource without having to worry about multiple parameters, while Update-AzTag provides more flexibility because, besides deleting tags, it can also merge or replace tag values.
If you want to delete all tags at subscription level, you can use the following command:
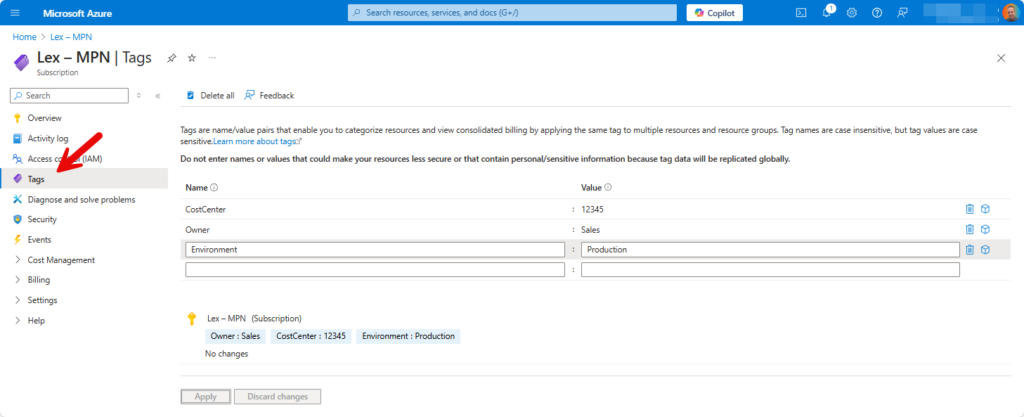
Remove-AzTag -ResourceId /subscriptions/xxxxxxxx-xxxx-xxxx-xxxx-xxxxxxxxxxxx (subscription ID)You can check subscription tags by navigating to your subscription and choose Tags in the left-hand menu.
For a more complete explanation of the Remove-AzTag command, please refer to the Documentation page.
Conclusion
In summary, maintaining Azure resource tagging with PowerShell scripts provides a robust and automated approach to enforcing governance across your Azure cloud environment. By using PowerShell, you can create, assign, and monitor resource tags to ensure consistency and compliance with organizational standards. Automating tasks such as applying tags, auditing resources, and remediating non-compliance saves time and reduces the risk of errors. As your Azure environment evolves, regularly reviewing and updating your PowerShell scripts will help you maintain effective governance and ensure that your tagging strategy continues to support cost management, resource organization, and operational efficiency.
Call to action
Ready to streamline your Azure Resource Tagging with PowerShell? Start implementing your tagging policies with PowerShell scripts today! By automating your tagging strategy, you can ensure compliance, improve organization, and optimize cost management across your cloud environment. Need help to start or refine your approach? Explore the links in the next section, or share your questions and ideas in the comments below. Let’s take your Azure governance to the next level and start Azure Resource Tagging with PowerShell!
Further reading
Here you have some more resources for further reading:
- Microsoft Learn
- This website