
With the proper permissions in the Azure portal, anybody can create any kind of resource of any size, configuration, and cost. However, you might want to prevent that resources of specific types, sizes, or any other configuration can be created. This is where Azure Policy comes in.
Azure Policy allows you to create, assign, and manage policies that enforce rules and standards for your resources, thereby ensuring that they comply with corporate standards and service-level agreements. Azure Policy allows you to apply governance across multiple subscriptions, resource groups, and resources.
Overview
In this blog, we introduce you to Azure Policy with a focus on tag creation. The blog has the following topics:
- Explain why Azure Policies are helpful in general.
- Explain how Azure Policies are helpful for Cost Management.
- The steps on how to create an Azure Policy and to assign it to a scope.
- Understand specific essential keywords/sections in an Azure Policy JSON file.
- Examples of Azure Policy files and snippets.
- A couple of handy resources.
Let’s go ahead!
What is the purpose of Azure Policy?
As mentioned in the introduction, Azure Policies help enforce rules and standards for your resources. Azure has many out-of-the-box rules, but you can also create custom policies. A couple of reasons why using Azure Policies is useful include:
- Governance and Compliance – Azure Policies enforce organizational standards and assess compliance at scale. For example, you can prevent non-compliant resources from being created or modify existing resources to align with company policies.
- Security – By applying policies that restrict or control certain operations, you can enhance the security of your environment. For example, you can ensure that all storage accounts have encryption enabled or that no public IP addresses are assigned to virtual machines.
- Operational Consistency – Azure Policies help maintain a consistent environment. For instance, you can enforce naming conventions or resource tagging across your organization, ensuring all resources are easily identifiable and manageable.
- Automation and Efficiency – Automated policy enforcement reduces manual intervention, minimizes errors, and speeds up the compliance process. This allows IT teams to focus on other tasks.
Why is Azure Policy Useful for Cost Management?
Reasons why Azure Policies can significantly aid in cost management include:
- Tagging for Cost Allocation – Policies can enforce the tagging of resources, making it easier to allocate and monitor costs across different departments, projects, or environments.
- Resource Optimization – Policies can enforce cost-effective VM sizes or storage types, helping optimize resource utilization.
How to Create a Policy Definition
A Policy Definition in Azure is a rule that describes the conditions which enforces a policy. Here’s how you can create a policy definition:
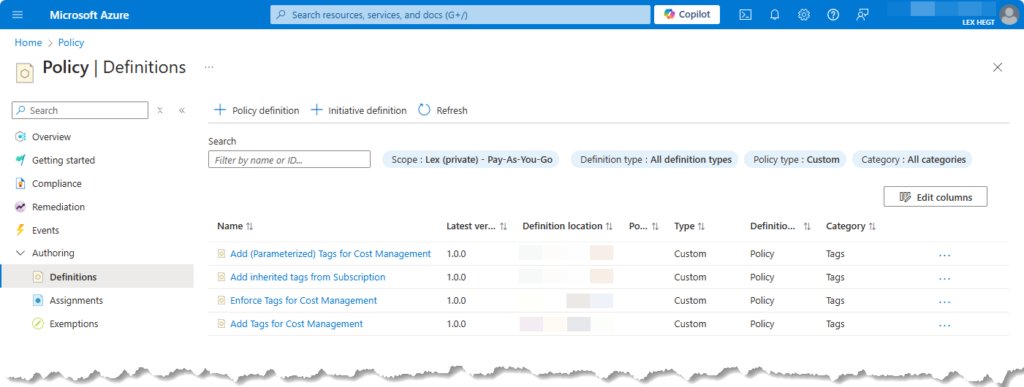
- Go to the Azure portal and search for “Policy” in the search bar.
- In the Azure Policy dashboard, under Authoring, click “Definitions” and then “Policy definition“.
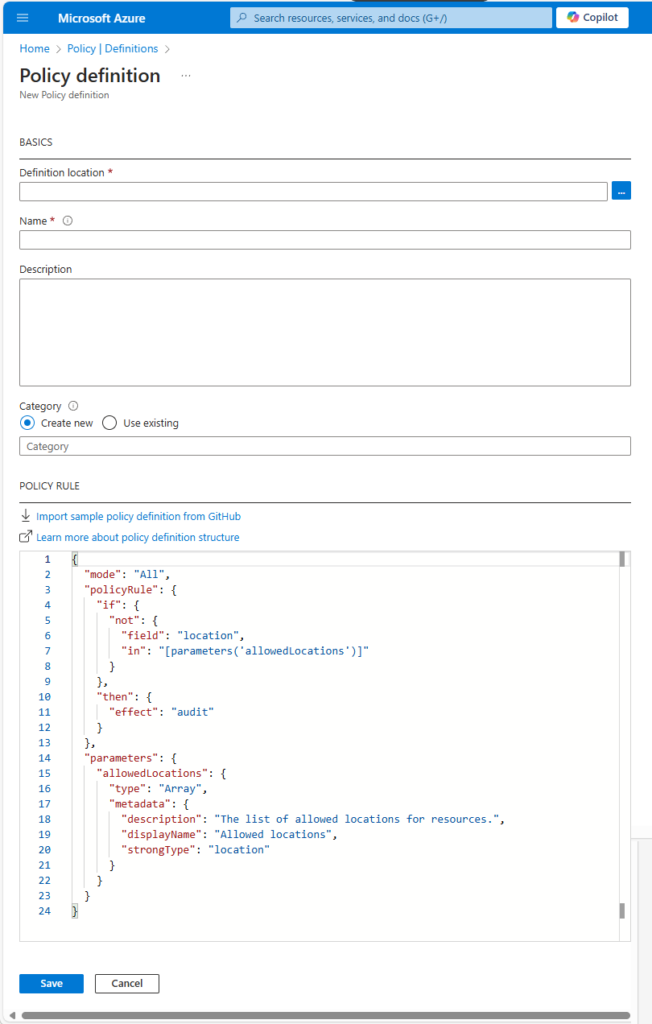
- Provide a unique name and description for your policy definition. Select a category the policy belongs to (e.g., Cost Management, Security, etc.).
- In the “Policy rule” section, define the policy rule using JSON. This rule specifies the conditions resources must meet to comply with the policy.
- When finished, click “Save” to create the policy definition.
How to Create a Policy Assignment
The next step is to assign it to a scope, such as a management group, subscription, or resource group. Here’s how to create a policy assignment:
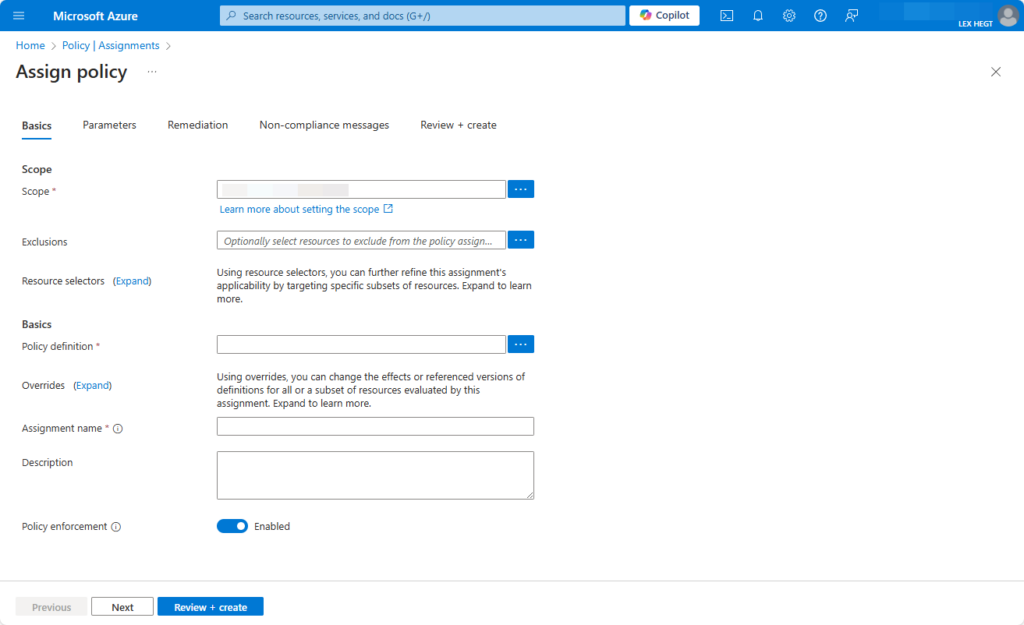
- Go to the Azure Policy dashboard and select “Assignments“.
- Click on “Assign policy“.
- Choose the policy definition you created. Then, select the scope (e.g., subscription or resource group) where you want to enforce the policy.
- Provide a name and description for the assignment. Next, configure any additional settings, such as parameters.
- Review the settings and click “Create” to finalize the policy assignment.
Example Policy File and explanation of essential keywords
Below is an example of an Azure Policy file to enforce Resource Tagging. In the next section, we’ll explain several important keywords.
{
  "properties": {
    "displayName": "Add Tags for Cost Management",
    "policyType": "Custom",
    "mode": "All",
    "metadata": {
      "category": "Tags"
    },
    "version": "1.0.0",
    "policyRule": {
      "if": {
        "anyOf": [
          {"field": "tags[Service]", "exists": "false"},
          {"field": "tags[Environment]", "exists": "false"},
          {"field": "tags[Cost Center]", "exists": "false"},
          {"field": "tags[Owner]", "exists": "false"}
        ]
      },
      "then": {
        "effect": "append",
        "details": [
          {"field": "tags['Service']", "value": "R&D"},
          {"field": "tags['Environment']", "value": "Env"},
          {"field": "tags['Cost Center']", "value": "12345"},
          {"field": "tags['Owner']", "value": "IT"}
        ]
      }
    }
  }
}
This policy ensures that a specified tag and value will be appended to resources if not already present.
Essential Sections of a Policy File
An Azure Policy file is a JSON document that defines specific rules and actions to enforce within an Azure environment. The policy file can range from simple rules to complex logic that governs various resources and scenarios. In this section, you find the explanations of the most essential keywords/sections of a policy file:
The mode keyword
The mode specifies the types of resources that the policy can evaluate. It determines the scope of resources that the policy can affect. Choosing the suitable mode is crucial as it determines the policy’s ability to enforce rules across different Azure resources.
Common values for mode include:
- “All” – The policy applies to all Azure Resource Manager (ARM) resources.
- “Indexed” – The policy only applies to resource types that support Azure Resource Manager indexing. You use this when the policy must evaluate data at the ARM level.
- “Microsoft.KeyVault/dataProtection” – Applies specifically to resources under a particular Azure service, such as Key Vault.
The parameters section
This optional section allows the policy to have customizable input values, making it flexible and reusable. Parameters are key-value pairs and can have several attributes:
type– Defines the data type of the parameter, such asString,Array,Boolean,Integer, etc.defaultValue-Provides a default value for the parameter, in case no other value is specified during policy assignment.metadata– Contains additional descriptive information about the parameter, such asdescriptionanddisplayName.
Example: In this example, the parameter allowedLocations is an array that specifies which locations are permitted for resource creation.
{ “parameters”: { “allowedLocations”: { “type”: “Array”, “metadata”: { “description”: “The list of allowed locations for resources.”, “displayName”: “Allowed Locations” }, “allowedValues”: [ “westeurope”, “northeurope” ], “defaultValue”: [ “westeurope”, “northeurope” ], “strongType”: “location” } }}
The policyRule section
This is the core section that defines the actual rule or condition the policy is enforcing. It uses logical expressions to determine whether a resource is compliant or non-compliant.
Key Components of policyRule:
if: Specifies the condition a resource must meet to be considered for enforcement. It uses logical operators (e.g.,equals,exists,contains,not,allOf,anyOf) to define complex conditions.then: Defines the action to be taken when the condition specified in theifstatement is met.
Example: In this example, the if condition checks if the location field of a resource is not in the list of allowedLocations. If the condition is met, the then clause enforces a Deny effect, preventing the resource from being created.
{"policyRule": { "if": { "field": "location", "notIn": "[parameters('allowedLocations')]" }, "then": { "effect": "Deny" } }
The effect section
This attribute defines the action Azure takes when a resource does not comply with the policy. The choice of effect depends on the enforcement strategy. For example, Deny is often used for strict compliance while Audit might be used in less critical scenarios where monitoring is sufficient.
Common effects include:
Deny: Prevents the creation or modification of non-compliant resources.Audit: Logs the non-compliance but does not prevent resource creation or modification.AuditIfNotExists: Audits resources if they are missing a specified resource or property.DeployIfNotExists: Automatically deploys a resource if it is missing.Append: Adds additional settings, like Tags, to a resource if it lacks specific configurations.
Useful Resources
For further reading and a better understanding of Azure Policy, consider exploring the following resources:
- Azure Policy Documentation
- Azure Policy Definition Structure
- JSON Templates for Azure Policies
- Azure Policy Samples on GitHub
In the 3 Ways to apply Azure Resource Tagging for Cost Management blog in this website, you can dive deeper on how to use Azure Policy for tagging Azure resources.
Conclusion
Azure Policies provide a robust framework for governance, compliance, and cost management within Azure environments. By understanding the detailed structure of a policy file, including key sections such as mode, parameters, policyRule, and effect, you can create powerful policies that enforce your organization’s standards and optimize cloud usage. Start implementing Azure Policies today to enhance your cloud governance and secure your Azure resources!
Call to Action: Explore the Azure Policy documentation and the other resources mentioned in this blog and start building your own governance rules!