
In the first article in this series, we focus on Azure Resources Tagging for Cost Management to clarify which resources belong to which Azure solution, who is responsible for each resource/solution, the costs for the resources, and so on.
Overview
For cost-effectiveness in the cloud, it is important to understand what resources belong to each solution, who owns these resources, resource usage and costs, etc. This kind of information helps keep a grip on cloud spend and enables us to better understand cost and rate optimization options. Azure Resource tagging is the recommended way to associate resources with solutions, owners, environments, etc., and in this blog, we describe several different ways how to apply resource tags in Microsoft Azure.
This article has the following topics:
- Why is resource tagging important.
- Manually add tags to new resources (ClickOps).
- Enforce adding Tags with Azure Policies to new/existing resources.
- Automate adding Tags with Azure Policies to new/existing resources.
Why is Azure Resource tagging important
Data is meaningless without context. You might have the most beautifully formatted Cost Management reports, but without understanding what solution or which department is responsible for what costs, the report is not of much value for cost management purposes.
This is where Cost Allocation comes in. Cost Allocation enables organisations to distribute cloud expenses to the departments, teams, projects, etc., that are responsible for these costs. So, Cost Allocation gives such teams visibility in their Cloud spend; this is the concept of Showback. Teams with insight into their cloud spend can explore whether all these costs are justified or if costs could be decreased via cost or rate optimization. In future blogs, we will focus on the difference between Cost and Rate Optimization and how to achieve it, but for now, it is enough to understand the importance of Cost Allocation and how to achieve it by applying a Tagging policy.
Tagging for Identification and Cost Management purposes
Let us assume that we have developed a simple solution that looks like below. The solution consists of resources like Service Bus Topic Subscriptions, Logic Apps, and API Management Operations. When all these individual resources are untagged, there is no context about them, and it will be hard to understand to what solution the resources belong and who owns the solution.
By using tags, we provide context about the individual resources for identification and cost management purposes. For example, we provide all the resources of the solution with tags like:
- Friendly name – for easier identification.
- Service/workload name – used for differentiating different services/workloads.
- Environment – for example: dev, test, staging, prod.
- Cost Center/Business Unit – for cost allocation purposes.
- Resource Owner – the identity of the responsible individual/team.
With these tags in place, it is much easier to identify all resources belonging to the same solution and allocate the associated costs for Showback purposes to the tagged Business Units/Resource Owners. Regular reports help these owners track trends, optimize costs, and understand the impact of these optimizations.

Where does Azure Resource Tagging fit in the FinOps lifecycle
Resource Tagging is one of the recommendations in the FinOps framework. This framework has the following three stages:
- Inform – Provide cost visibility and allocation.
- Optimize – Find and implement Cost and Rate optimizations.
- Operate – Introduce FinOps practices in the organisation.
Based on these three phases, you will understand that Resource Tagging is part of the Inform phase.
Read more about the FinOps phases on the FinOps Foundation website.
Manually add tags to new resources (ClickOps)
ClickOps is the concept of manually creating and managing resources (in the Azure portal), which is the easiest way to add tags to our resources. Adding tags manually gives a lot of control and flexibility in applying a tagging policy. See below how tags are applied when creating a Resource Group.
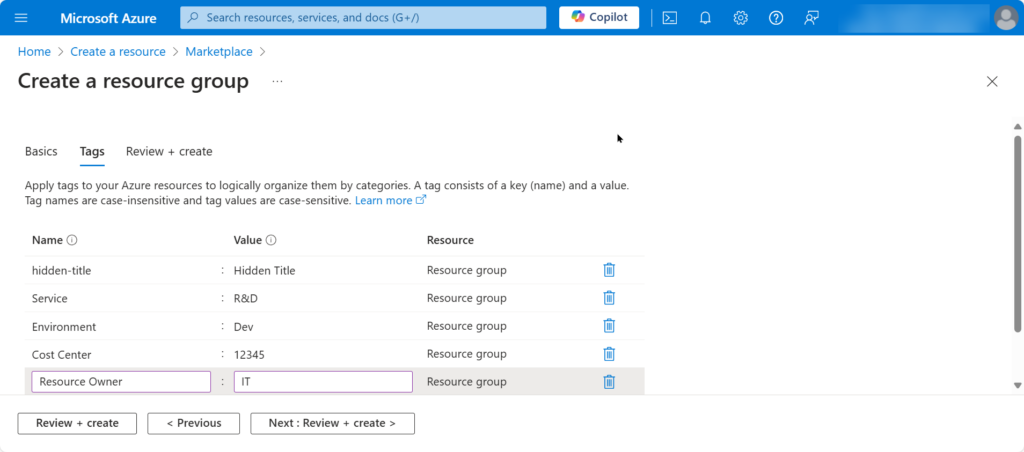
Note that in the above screenshot, there is a tag with the name hidden-title. This tag shows up as a friendly name next to the resource’s actual name and allows us to give more context to the resources. For example, we can use it to explain the purpose of the resource, what solution it belongs to, etc.

Read more about hidden tags in Luke’s blog article.
Disadvantages of manually adding tags
However, despite the benefits of manual Azure Resource tagging, there are also several disadvantages of this approach. This includes reasons like:
- Time-consumption – Especially with huge numbers of resources, manual tagging resources is very time-intensive.
- Error-prone – It is easy to make typos and introduce inconsistencies in tags.
- Maintenance overhead – Keeping tags up to date adds to the maintenance workload.
- No automation – The best practice is to create resources using deployment scripts for reproducibility and predictability.
So, although adding tags to resources manually is better than not adding tags at all, it is even better to explore less time-consuming and error-prone ways to consistently add tags to our resources.
Enforce adding Tags with Azure Policies to new resources
To prevent someone forgets to add tags when manually creating resources, we have the ability to use Azure Policy to enforce adding tags. In this section, we explore how to set this up.
If you have no experience with Azure Policy, read this Introduction to Azure Policy article.
When we create a resource in Azure, you can add one or more Tags on the Tags tab page. But without Azure Policies, it is easy to forget this. To prevent forgetting to add Tags, we can create an Azure Policy Definition that checks if the Tags are added. Next, we create an Assignment to assign the Policy to an Azure Subscription or Resource Group.
Depending on what works best in our situation, we can create policies that do the following:
- Deny the creation of a resource until specific tags are added.
- Create tags based on tag values that we define in the Policy definition.
- Create tags based on parameters that we configure in the Assignment.
- Create tags based on tag values that we inherit from parent resources.
The below screenshot shows the Tags tab page without policies in place.

Let’s explore how to accommodate all the mentioned scenarios.
Deny the creation of a resource until specific tags are added
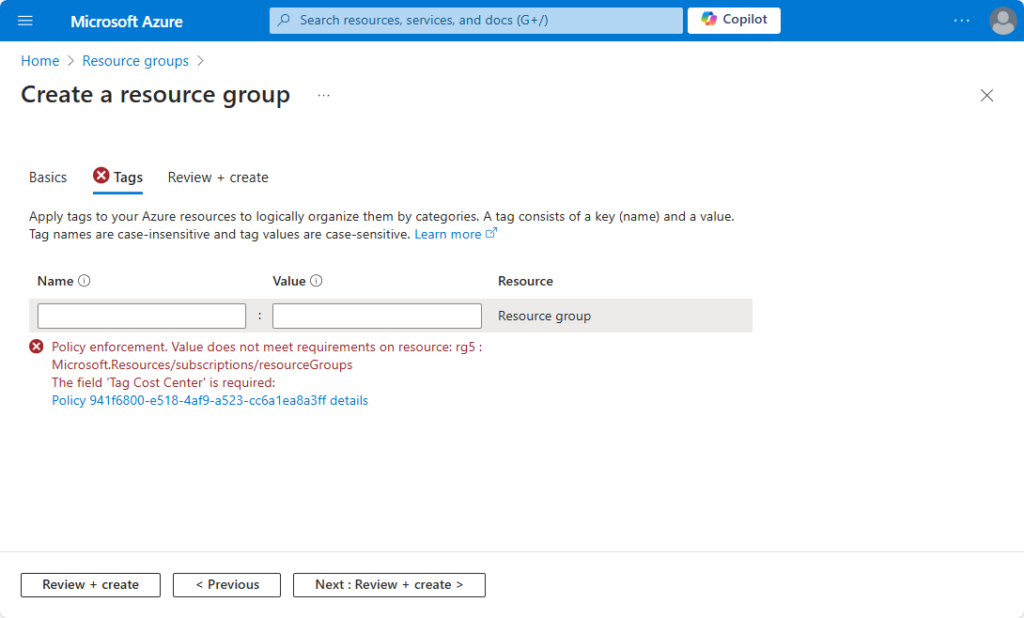
The scenario is as follows: We want to create resources with specific tags that we use for Cost Management purposes. In our example scenario, we want to use the following tags for all our resources:
- Service
- Environment
- Cost Center
- Owner
A warning must appear when an operator creates an Azure resource but forgets to add the tags. The warning must contain the tags that the operator must add. See the screenshot below for an example.
A policy definition that supports these requirements looks like below.
{
  "properties": {
    "displayName": "Enforce Tags for Cost Management",
    "policyType": "Custom",
    "mode": "All",
    "metadata": {
      "category": "Tags"
    },
    "version": "1.0.0",
    "policyRule": {
      "if": {
        "anyOf": [
          { "field": "tags[Service]", "exists": "false" },
          { "field": "tags[Environment]", "exists": "false" },
          { "field": "tags[Cost Center]", "exists": "false" },
          { "field": "tags[Owner]", "exists": "false" }
        ]
      },
      "then": { "effect": "deny" }
    }
  }
}
To bring this policy into action, we perform the following:
- Create an Azure Policy Definition.
- Assign the policy to a Subscription, Resource Group, or Resource.
Let’s go ahead!
Create an Azure Policy Definition
- In the Azure Portal, we navigate to Policy.
- Expand Authoring in the left-hand side menu.
- Select Definitions.
- Click the + Policy Definition button; the Policy Definition page appears.
- Click the Definition location ellipsis button (…) and select the Subscription where the policy must be stored.
- In the Name field, provide a descriptive name for the policy. Example: Enforce Tags for Cost Management.
- Optionally, in the Description field, we provide a description of this policy.
- In the Category field, select Use Existing, and in the dropdown, choose Tags. This helps later if we want to filter policies on the previous page.
- In the Policy Rule field, we can write our policy. We can also use the above policy.
- Now, we hit the Save button.
If there are no syntax errors, the policy will be saved. If there are errors in the JSON, we get a message “Invalid JSON” without any indication of what’s wrong. To fix the JSON, we use tools like JSONLint or even ChatGPT. I prefer to use the latter one because it explains in human (non-technical) language where it found error(s) and even provides the fixed JSON for easy copy/pasting into the policy editor.
With the correct prompts, we can even create Azure Policies with ChatGPT!
Assign the policy to a Subscription, Resource Group, or Resource
- Under Authoring, select Assignments.
- Click Assign Policy; the Assign policy page appears.
- Click the Scope ellipsis button(…) and select the Subscription to which the policy must be applied. Optionally, we can select Resource Groups and resources to which we want to apply the policy.

- In the Exclusions field, we can optionally exclude resources from the policy assignment.
- Next, click the Policy Definition ellipsis button(…); the Available Definitions blade appears. In that blade, we can use the available Search and Filter capabilities to locate and select the policy definition we created before.
- In the Assignment name field, we provide the name of the assignment. For easy identification, we use the same name as the policy definition.
- Optionally, there are fields for Overrides and providing a Description.
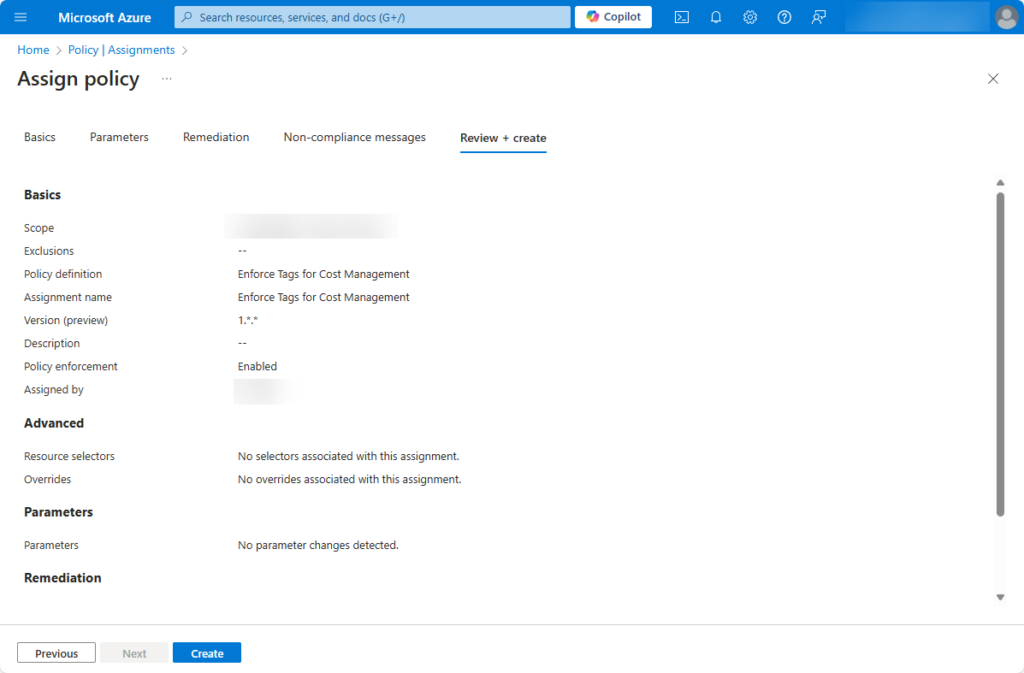
- Next, we click the Review + create button; the Review + create tab page appears.
- We review the provided values, and if okay, we click Create, and the assignment will be created.
With this policy in place, we enforce adding tags when creating resources within the scope we defined in the assignment.
How to automatically add tags to resources
In the previous section, we have seen how to enforce tags when creating Azure resources. However, instead of forcing somebody to provide tag values, we can also provide the tag values as follows:
- Use pre-defined (hard-coded) tag values from the policy definition.
- Parameterize tag values in the policy assignment.
- Inherit tag values from parent resources.
Let’s explore how to set up these different ways of tagging resources.
Use pre-defined (hard-coded) tag values from the policy definition
When we want to apply specific tags to resources, we can use a policy definition to do it in a hard-coded way. Upon resource creation, the below policy definition checks if specific tags and tag values have been provided and if not, the policy definition adds (appends) the required tags, including values, from the policy definition.
{
  "properties": {
    "displayName": "Add Tags for Cost Management",
    "policyType": "Custom",
    "mode": "All",
    "metadata": {
      "category": "Tags"
    },
    "version": "1.0.0",
    "policyRule": {
      "if": {
        "anyOf": [
          {"field": "tags[Service]", "exists": "false"},
          {"field": "tags[Environment]", "exists": "false"},
          {"field": "tags[Cost Center]", "exists": "false"},
          {"field": "tags[Owner]", "exists": "false"}
        ]
      },
      "then": {
        "effect": "append",
        "details": [
          {"field": "tags['Service']", "value": "R&D"},
          {"field": "tags['Environment']", "value": "Env"},
          {"field": "tags['Cost Center']", "value": "12345"},
          {"field": "tags['Owner']", "value": "IT"}
        ]
      }
    }
  }
}
We can apply this policy in the same way we did when we enforced manually providing tags in the previous section.
Parameterize tag values in the policy assignment
A slightly more flexible way of (automatically) adding tags to resources is to make them configurable. We do this by defining the tags as parameters in the policy definition. After that, when we create the assignment for the policy definition, we provide values for each tag parameter.
This policy definition has parameters for four different tags that we want to be created. When we create the assignment for this policy, we must provide a value for each parameter.
{
  "mode": "All",
  "policyRule": {
    "if": {
      "anyOf": [
        {"field": "tags[Service]", "exists": "false"},
        {"field": "tags[Environment]", "exists": "false"},
        {"field": "tags[CostCenter]", "exists": "false"},
        {"field": "tags[Owner]", "exists": "false"}
      ]
    },
    "then": {
      "effect": "append",
      "details": [
        {"field": "tags.Service", "value": "[parameters('serviceTagValue')]"},
        {"field": "tags.Environment", "value": "[parameters('environmentTagValue')]"},
        {"field": "tags.CostCenter", "value": "[parameters('costCenterTagValue')]"},
        {"field": "tags.Owner", "value": "[parameters('ownerTagValue')]"}
      ]
    }
  },
  "parameters": {
    "serviceTagValue": {"type": "String"},
    "environmentTagValue": {"type": "String"},
    "costCenterTagValue": {"type": "String"},
    "ownerTagValue": {"type": "String"}
  }
}
The screenshot shows the Parameter tab page, where you must provide values for each tag/parameter when creating the assignment.

Again, getting this policy to work is pretty much the same as with the other policies we have seen until now. In this case, we create the policy definition, and during the creation of the assignments, we provide values for all the parameters/tags. Now, when we create a resource that misses those tags, the policy adds those tags using the values we provided in the assignment.
Inherit tag values from parent resources
Another way to add non-existent tags to a resource is to inherit them from a parent resource, such as a Resource Group or a Subscription. The policy definition below adds tags to resources by inheriting tag values from its parent subscription.
{
  "mode": "All",
  "policyRule": {
    "if": {
      "anyOf": [
        { "field": "tags.Service", "exists": "false" },
        { "field": "tags.Environment", "exists": "false" },
        { "field": "tags.CostCenter", "exists": "false" },
        { "field": "tags.Owner", "exists": "false" }
      ]
    },
    "then": {
      "effect": "modify",
      "details": {
        "roleDefinitionIds": [
          "/providers/microsoft.authorization/roleDefinitions/acdd72a7-3385-48ef-bd42-f606fba81ae7"
        ],
        "operations": [
          { "operation": "addOrReplace", "field": "tags.Service", "value": "[subscription().tags['Service']]" },
          { "operation": "addOrReplace", "field": "tags.Environment", "value": "[subscription().tags['Environment']]" },
          { "operation": "addOrReplace", "field": "tags.CostCenter", "value": "[subscription().tags['CostCenter']]" },
          { "operation": "addOrReplace", "field": "tags.Owner", "value": "[subscription().tags['Owner']]" }
        ]
      }
    }
  }
}
Conclusion
For cost management purposes, we want to understand what resources belong to a solution and who is the responsible for the costs of the solution’s resources. Azure Resource tagging is a best practice to associate resources to solutions and cost owners. With proper resource tagging in place, we can report cost to those cost owners and with enough resource usage details, this enables cost owners to explore cost optmization.
In this relatively long blog, we discussed how to manually add tags, but we have also seen multiple ways to add tags automatically by using Azure Policy.
Call to Action
Now it is up to you! This blog contains everything you need to get started with resource tagging yourself, including working examples of Azure Policy definitions and the steps about how to bring these policies into action.
Feel free to reach out to me and share your thoughts and feedback about this blog, the topic of resource tagging, or FinOps in general.
Further reading
Here you have some more resources for further reading: